Moving bits around: Deploying Splunk Apps with Github Actions
It would be reasonable to argue that no matter the size of the deployment, there aren’t many Splunk deployments out there that have not leveraged the Deployment Server to manage and distribute Splunk apps to other components. Just put everything in the $SPLUNK_HOME/etc/apps/deployment-apps directory of the Deployment Server and create server classes connecting the relevant apps to the appropriate clients that are phoning home. Easy, right? But the big catch with that is this — what if we overwrite a working app with some modifications that may then have to be rolled back, or say, multiple Splunk admins are editing the same configurations or if we accidentally delete one or more apps within the directory and we don’t know which ones. Of course, restoring a full backup of that directory might solve all these problems, provided a full back-up is regularly taken at a short enough interval but this isn’t a great way of managing it in a dynamic environment where there are always changes getting pushed over the apps. It turns out that these are the problems that a version control tool is designed to solve.
Now for most folks, when you hear about version control or source code control, Git is the first and perhaps the only word that comes to mind. And the second word will likely be GitHub which is arguably the most popular source code hosting tool out there that’s based on Git. But is it enough to use Git and Github for version-controlling and hosting Splunk apps for deployment? In a functional sense yes, but not so much from an admin perspective. You must still manage deploying these apps to Splunk Deployment server. This is what could be an example of a “toil” according to Google’s SRE principles. This can and should be eliminated by simply having a CI/CD setup. By the end of 2019, GitHub introduced their own CI/CD setup native to the GitHub platform called GitHub Actions. GitHub Actions is a workflow orchestration and automation tool that can trigger actions based on events such as changes in the GitHub repository. GitHub Actions in our case, can help automate the task of deploying apps to the Deployment Server staging directory.
Automate Splunk App Deployment with GitHub Actions
So we have hosted our Splunk apps in a GitHub repository properly source-controlled. Now let’s explore how we can automate deploying them to the Deployment Server using GitHub Actions.
Note: What this article covers is not a production ready prescriptive solution. The use of GitHub Actions here is solely because of the relatively simple one-stop-shop approach in realizing the benefits of version-controlled hosting as well as continuous deployment of Splunk apps.
The setup consists of three parts – the source (GitHub Repository), the intermediary (runner) and the destination (Deployment Server). GitHub Actions invokes a runner instance as an intermediary to run the actions from. This instance is what will connect to the target server. This can either be a self-hosted runner that you must provision in your infrastructure or a GitHub-hosted runner.
Let me highlight a couple of important factors at play in choosing the runner instance type.
1. Security Considerations
Hosting self-hosted runners or using GitHub-hosted runners have some common as well as unique security implications. While network connectivity requirements are unique to each approach, SSH authentication is common to both. You may either not want to allow external connections directly to Deployment Server or you may be having a public repository. GitHub recommends that you only use self-hosted runners with private repositories. This is because forks of your repository can potentially run dangerous code on your self-hosted runner machine by creating a pull request that executes the code in a workflow. This is not an issue with GitHub-hosted runners because each GitHub-hosted runner is always a clean isolated virtual machine, and it is destroyed at the end of the job execution.
2. Usage limits and Billing
Usage limits are primarily based on storage and free minutes. Self-hosted runners are free to use but come with some usage limits. For GitHub-hosted runners, different usage limits apply.
I have linked the documentation in the appendix for further reading on this topic.
For demonstration purposes, I am going to use a self-hosted runner.
Destination:
Let’s configure the destination first which is the Deployment Server.
On a high level, the steps involve
- Creating an SSH key-pair
- Creating a user specific for the task in the Deployment Server
- Making the Deployment Server accessible using the above created SSH key-pair for the created user
- Setting proper permissions on the target staging directory
First off, we create an SSH key locally like so:
ssh-keygen -t ed25519 -C "your_email@example.com"Enter the file name to save the keys and leave the passphrase field empty.
Then we login to the Deployment Server and create a user, say, ghuser, in there.
Make the host accessible for the user over SSH by adding the above created public key to the /home/ghuser/.ssh/authorized_keys. I have linked a page in the appendix that covers step-by-step instructions on how to do this in a Linux instance.
Next, we need to give this user full access to $SPLUNK_HOME/etc/deployment-apps directory. For instance, if Splunk is installed under /opt, then:
setfacl -R -m u:ghuser:rwx /opt/splunk/etc/deployment-appsNow, if Splunk is run as a non-root user, commonly named as splunk, then that user can be leveraged for this purpose in which case you do not need to grant any additional directory permissions as above.
Once this is completed, we now have a user that can SSH to the deployment server and modify the deployment-apps directory. We will be using this user in our GitHub Actions.
Intermediary:
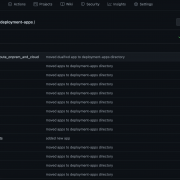
Once the runner instance is provisioned , we need to install the client application on the host to poll the repository. Go to Settings -> Actions -> Runners in the GitHub Repository.
When you click on the Add runner button as shown above and select the OS and CPU arch, you are presented with the instruction to set up the client application. Now for the client application to successfully do HTTPS long polls to the GitHub repository, you must ensure that the host has the appropriate network access to communicate with specific GitHub URLs. Appendix has a link that points to those URLs.
Next the self-hosted runner needs to be set up with Docker for the specific GitHub Action that we are going to set up in the next step. This is also straightforward. Here I am using an Amazon Linux 2 EC2 instance and here are the installation steps for that:
- Update your system
$ sudo yum update -y - Install Docker
$ sudo yum install docker -y - Start Docker
$ sudo service docker start - Add your user to the docker group
$ sudo usermod -a -G docker USERNAME - Log out and log back in.
- Verify Docker runs without sudo
$ docker run hello-world
I have linked a document in Appendix that covers Docker installation on different Linux flavors.
Source:
GitHub Actions has a marketplace where we can look for off-the-shelf solutions which in our case is to push the apps out from the repository to the deployment server. In this example, I have used two workflows; 1) checkout that is a standard GitHub-provided Action to check out the repository and 2) rsync-deployments that essentially spins up a docker container in the runner to rsync the specified directory from the checked-out repository to the destination directory in the target host.
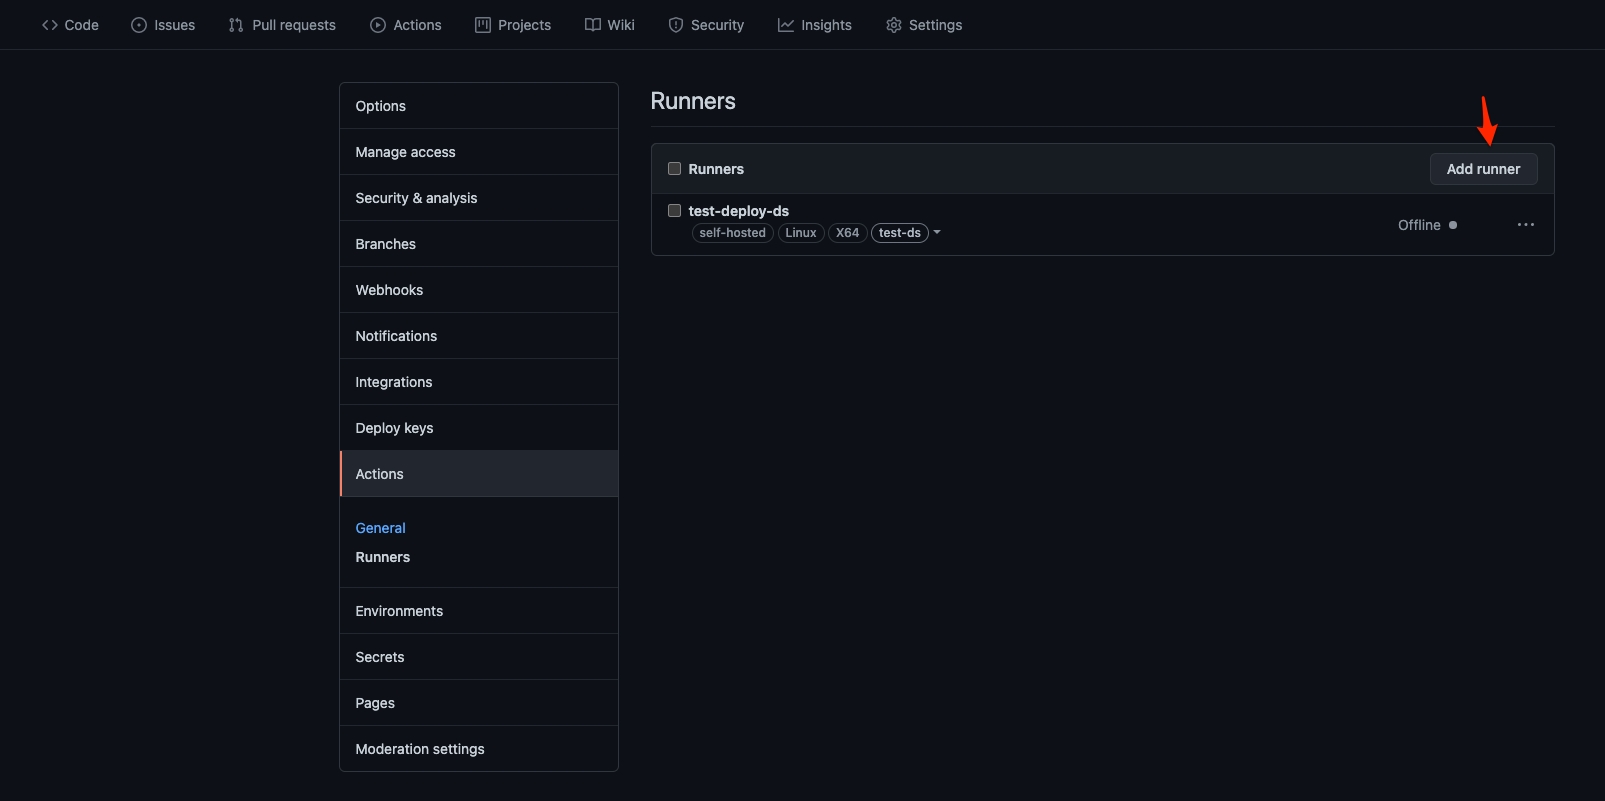
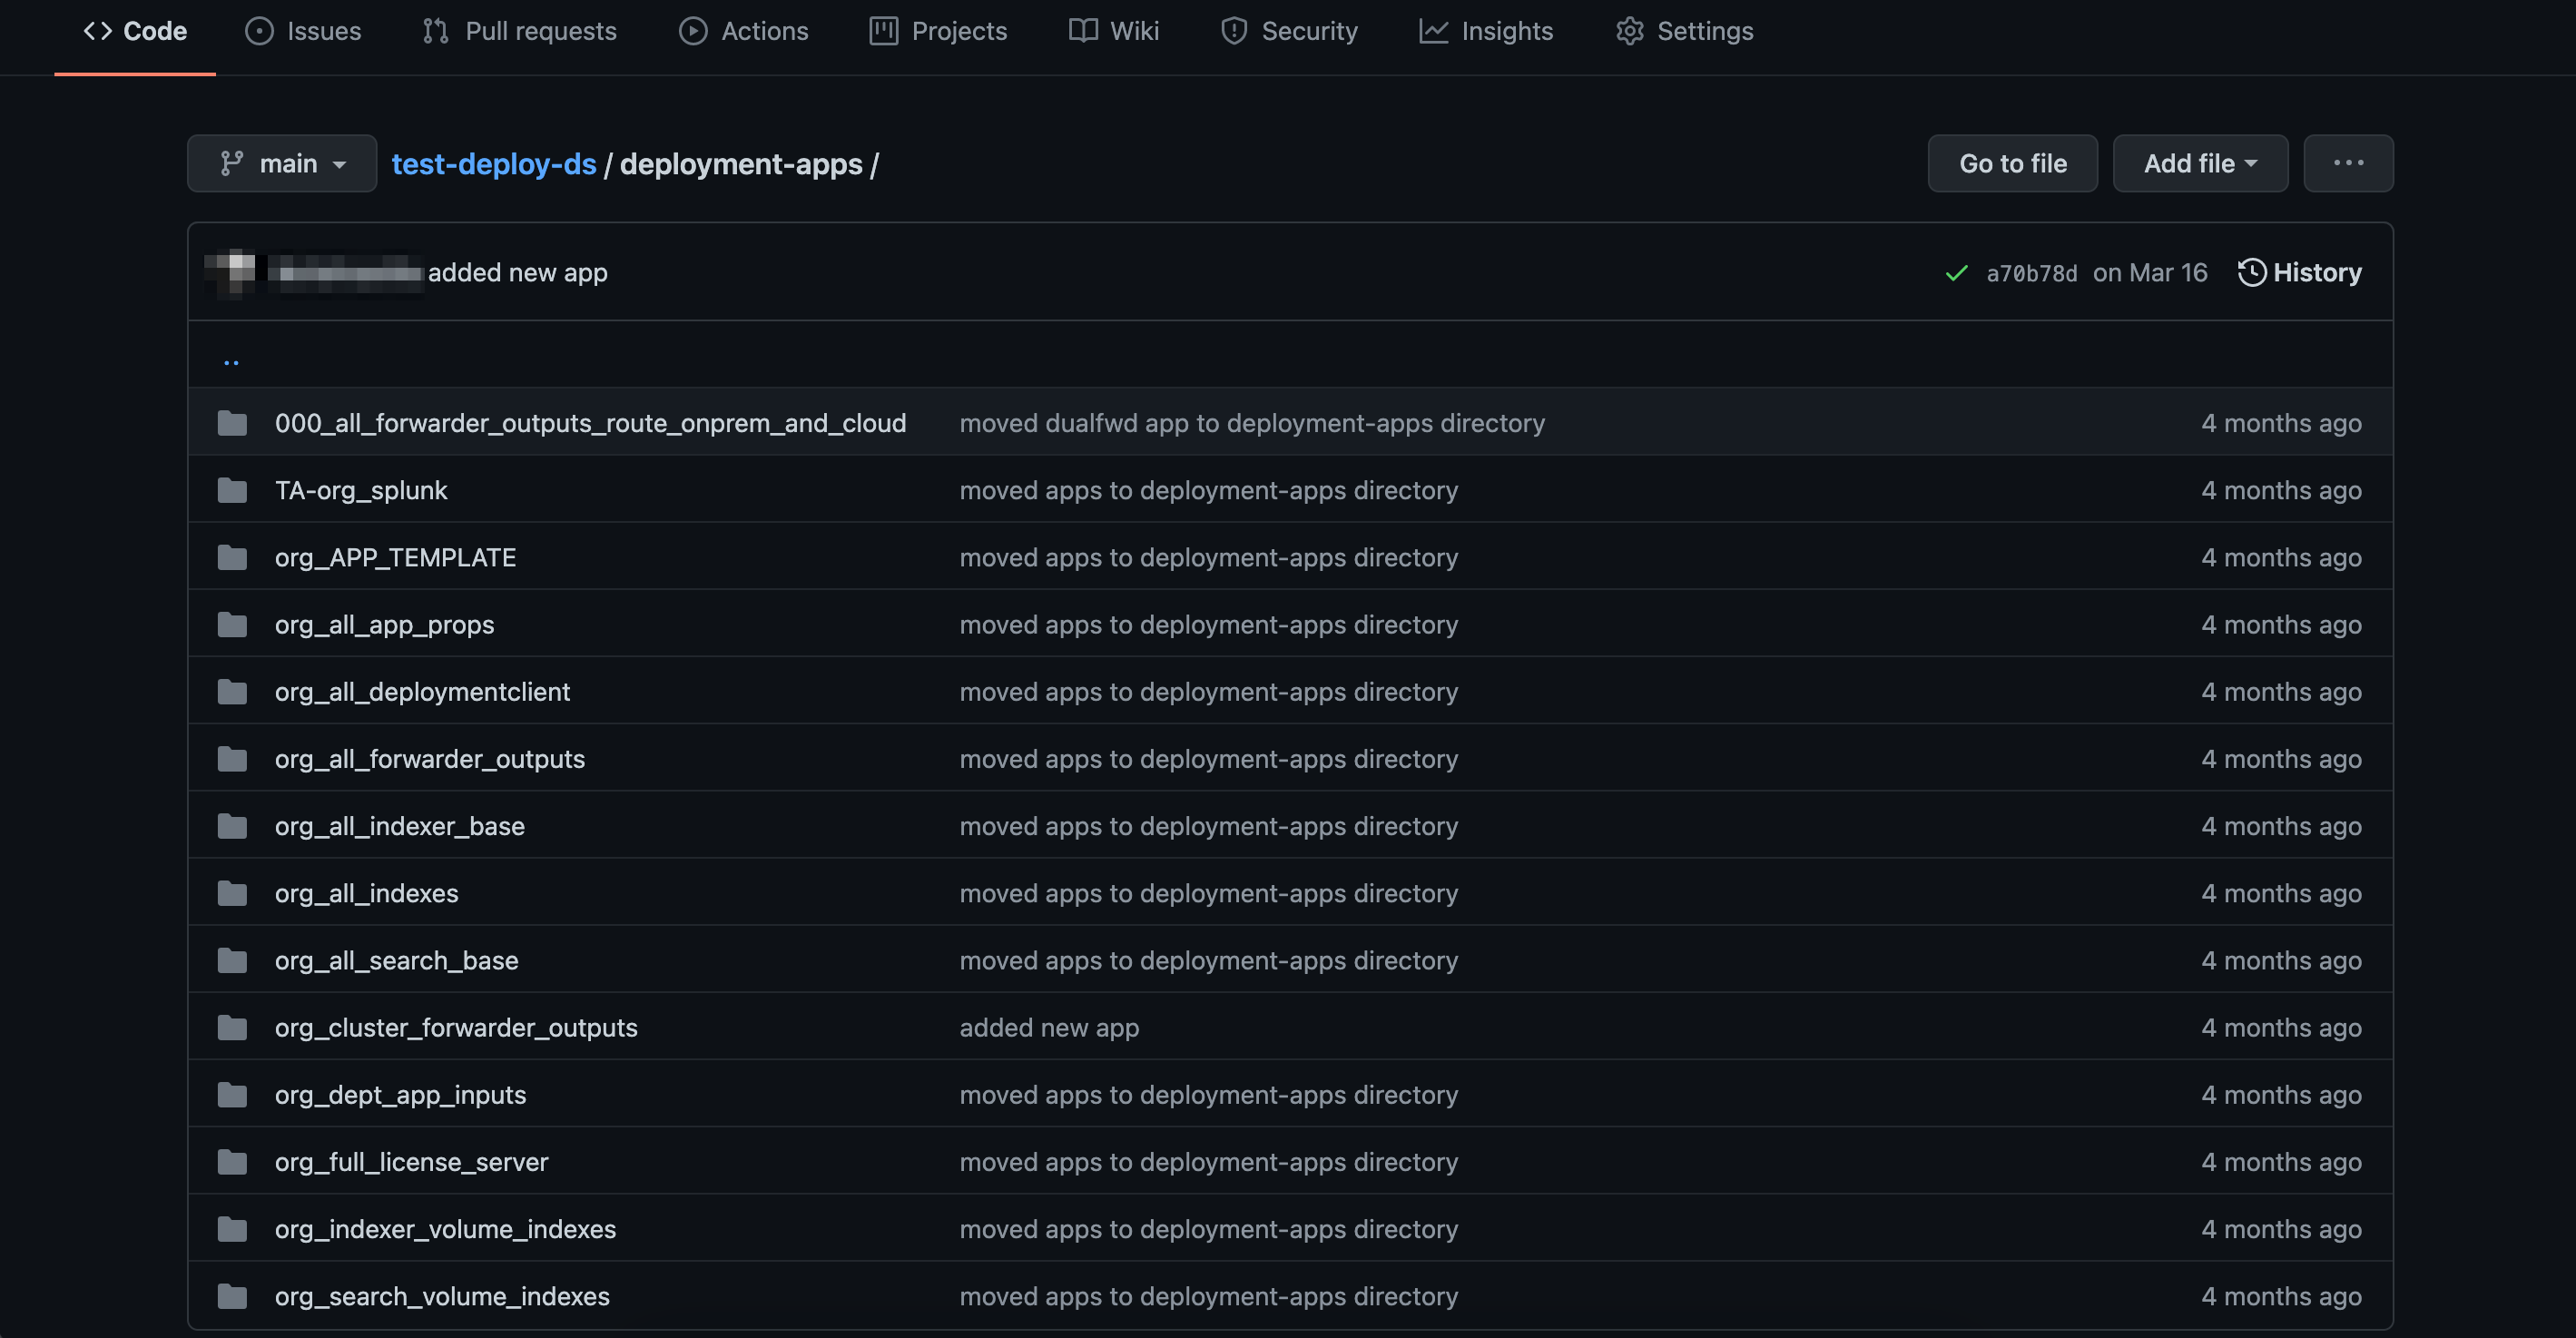
First, we create a repository with a sub-directory that contains all the Splunk apps to be copied to the deployment server’s deployment-apps directory. In this example the repository I have used is test-deploy-ds and all the Splunk apps reside within a subdirectory that I have named as deployment-apps to match with the target directory, but this can be any name you want. See below:
Then we create a simple workflow from the Actions tab of the repository like so:
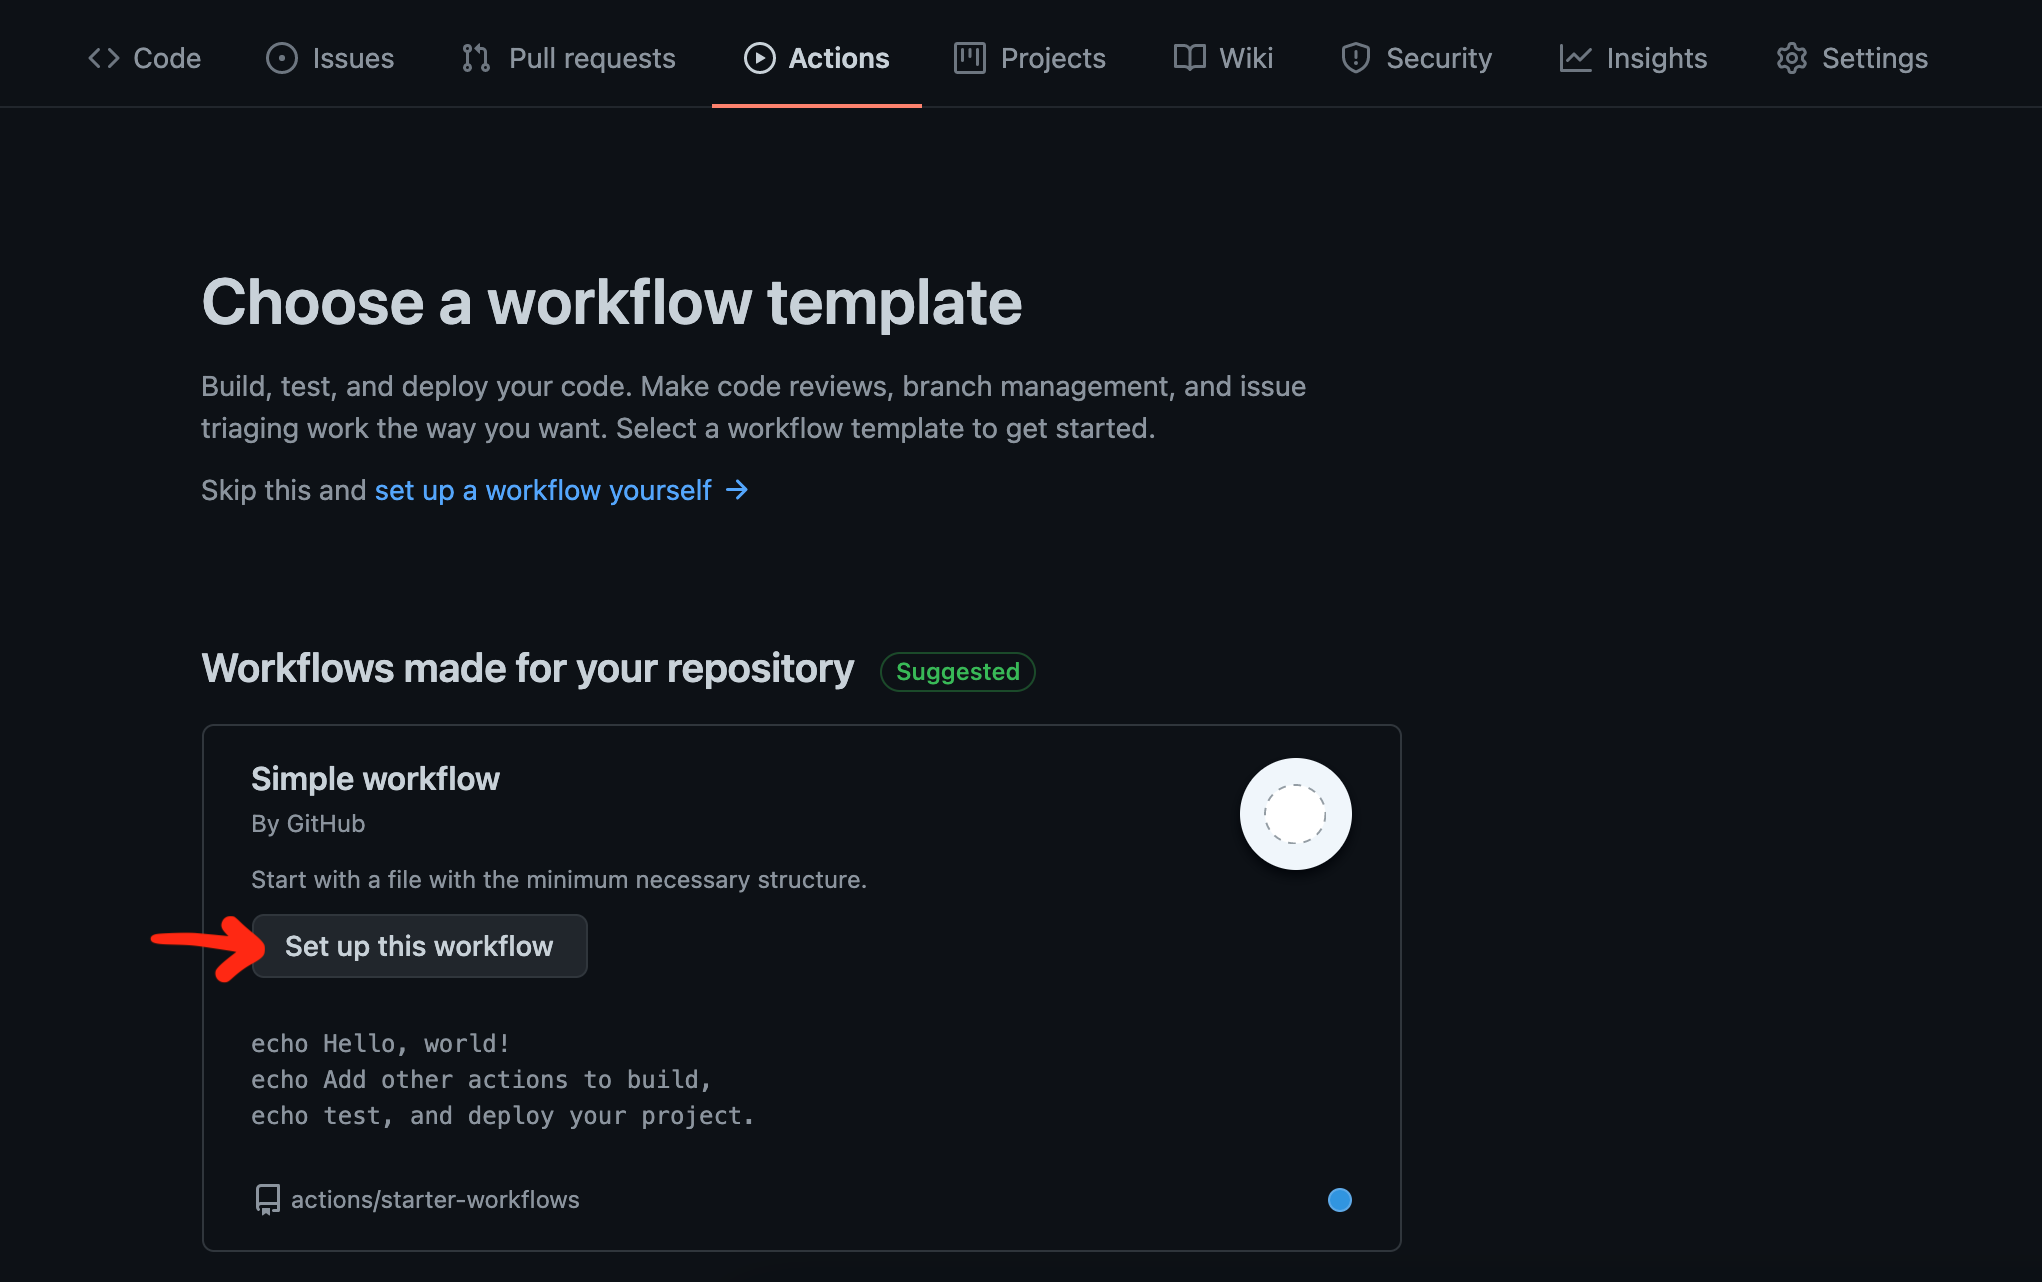
Name the yml file that opens in the next screen suitably like push2ds.yml or so.
Modify the file as below.
# This is a basic workflow to help you get started with Actions
name: CI
# Controls when the action will run.
on:
# Triggers the workflow on push or pull request events but only for the main branch
push:
branches: [ main ]
# Allows you to run this workflow manually from the Actions tab
workflow_dispatch:
# A workflow run is made up of one or more jobs that can run sequentially or in parallel
jobs:
# This workflow contains a single job called "build"
build:
# The type of runner that the job will run on
runs-on: self-hosted
# Steps represent a sequence of tasks that will be executed as part of the job
steps:
# Checks-out your repository under $GITHUB_WORKSPACE, so your job can access it
- uses: actions/checkout@v2
# Runs the Rsync Deployment action
- name: Rsync Deployments Action
uses: Burnett01/rsync-deployments@4.1
with:
switches: -avzr --delete --omit-dir-times --no-perms --no-owner
path: deployment-apps/
remote_path: /opt/splunk/etc/deployment-apps
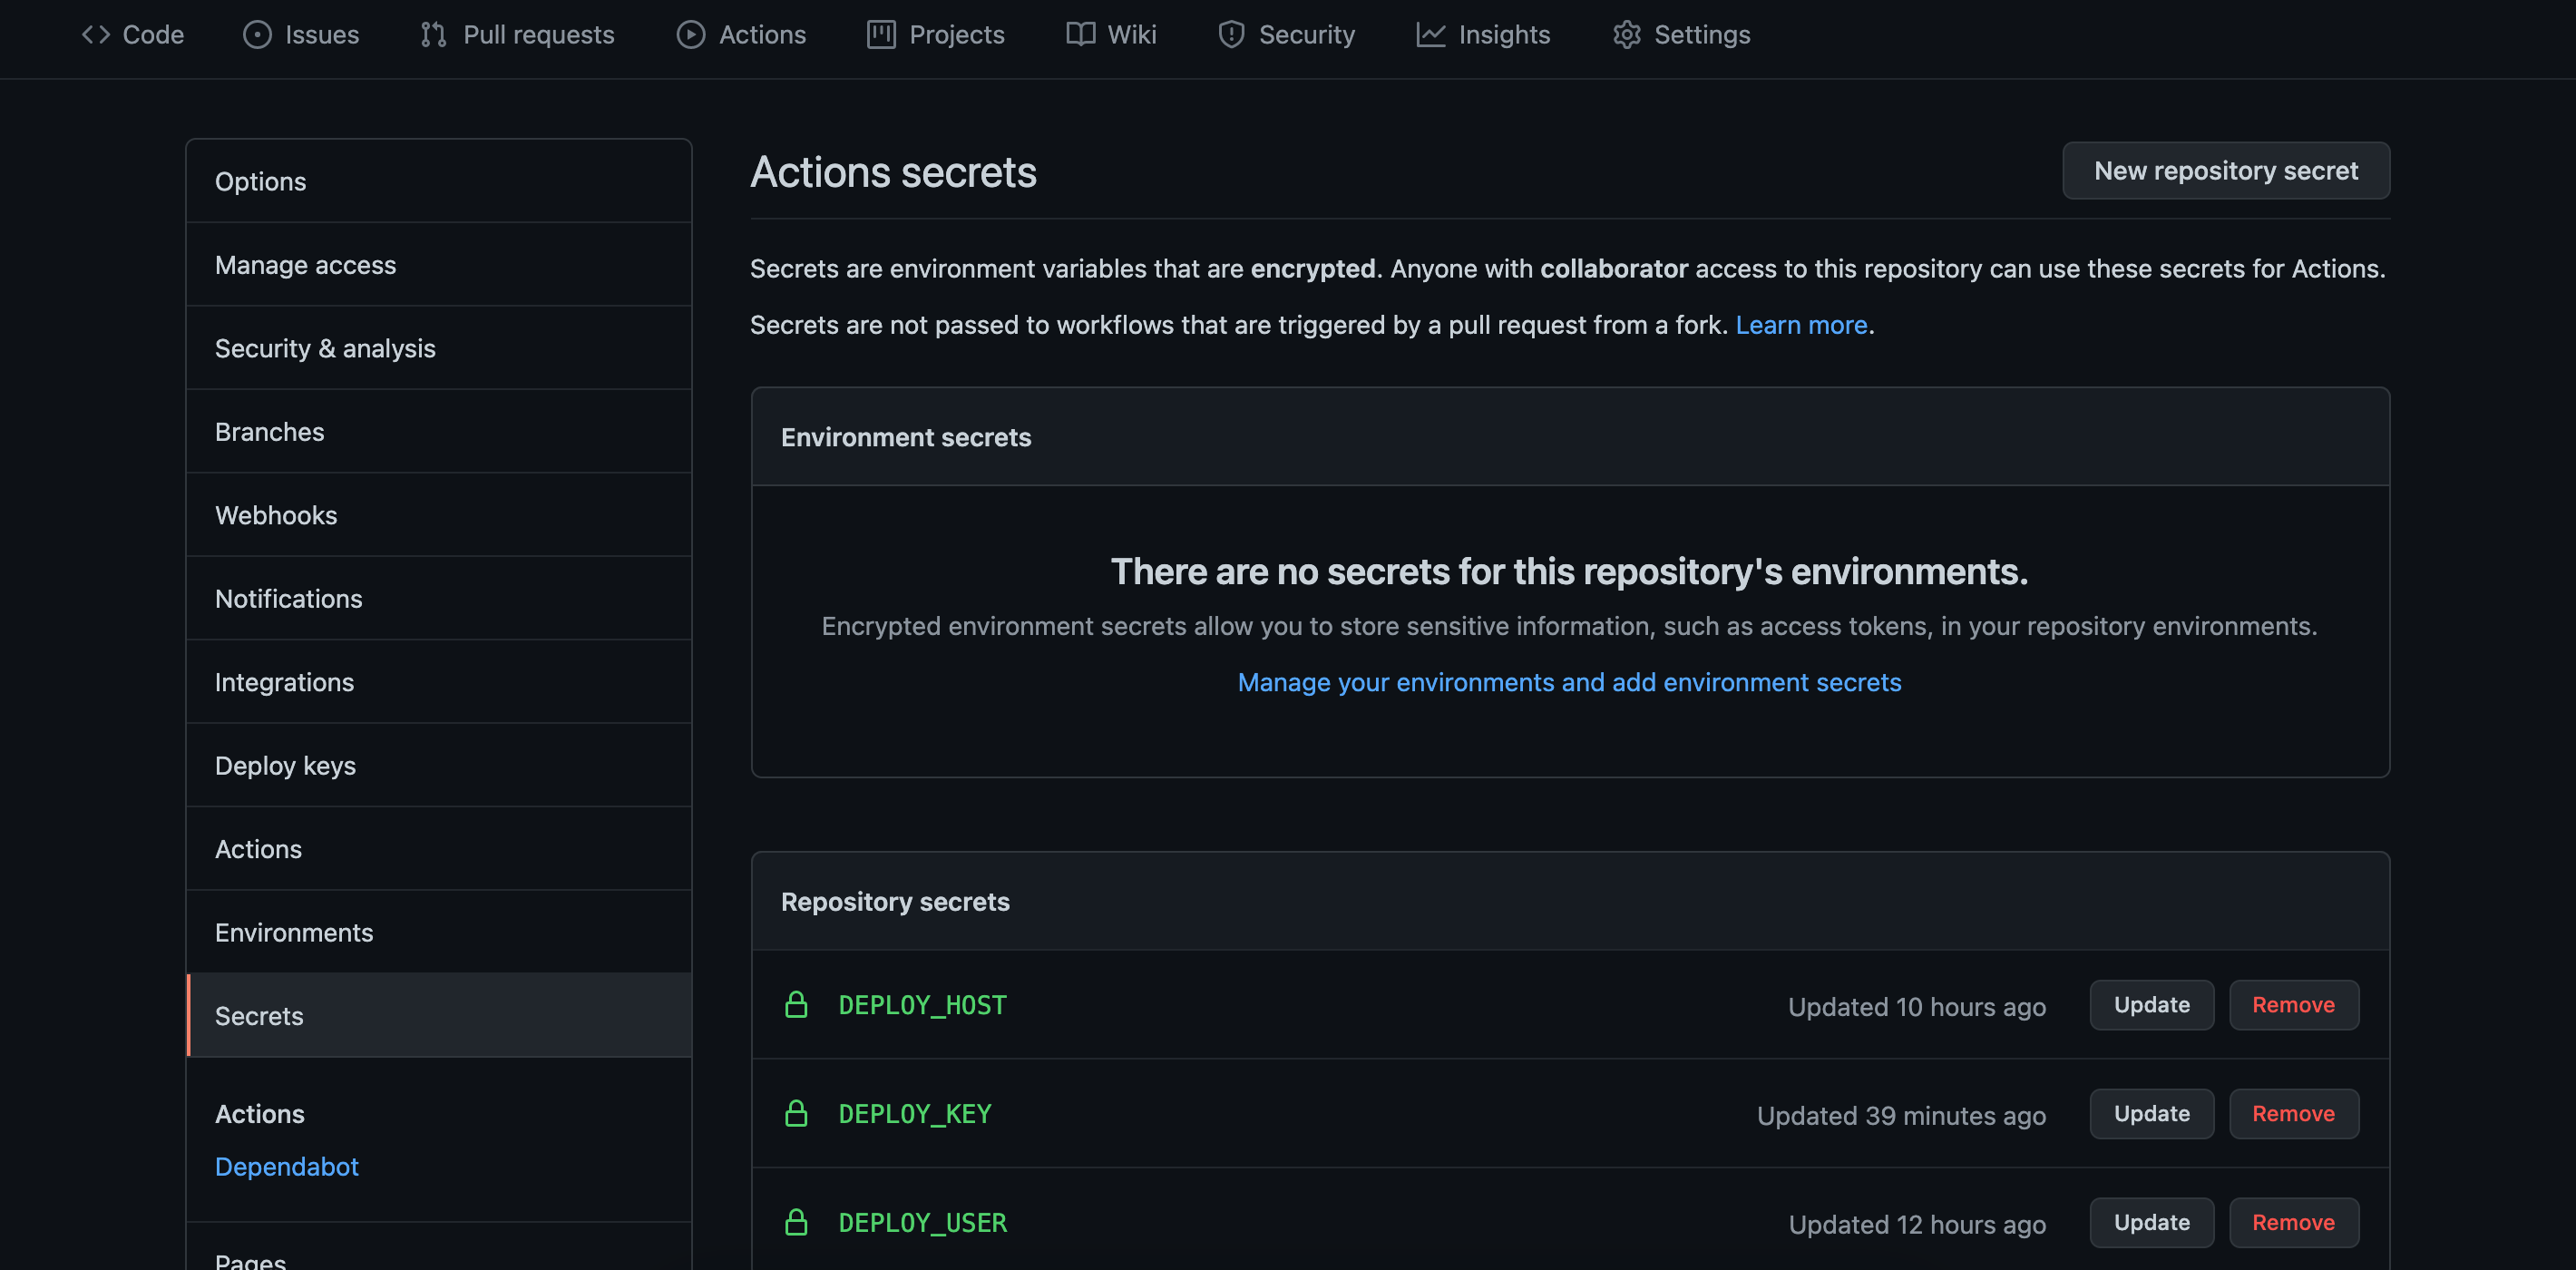
remote_host: ${{ secrets.DEPLOY_HOST }}
remote_user: ${{ secrets.DEPLOY_USER }}
remote_key: ${{ secrets.DEPLOY_KEY }}Explanation:
1) This workflow is triggered upon a push to main branch
2) The build specifies the job that will be run on a self-hosted runner
3) The steps in the build job includes checking out the repository using the checkout action followed by the rsync execution using the rsync-deployments action
Lets dissect the rsync-deployments action as this is the custom code I had to write for the use case:
- the
nameattribute is a briefly descriptive name of what the Action does - the
usesattribute then includes the marketplace action rsync-deployments to be referenced - the
withattribute has several attributes inside as belowswitchesattribute has the parameters required to be passed with therysnccommand. Check out the link in the appendix for what each of them does.
pathrepresents the source directory name within the repository which in this case has been named asdeployment-apps
remote_pathis the deployment server$SPLUNK_HOME/etc/deployment-appsdirectory
remote_hostis the deployment server public IP or hostname
remote_useris the username we created in the deployment server that isghuser
remote_keyis the SSH private key created earlier to be used to authenticate into the deployment server
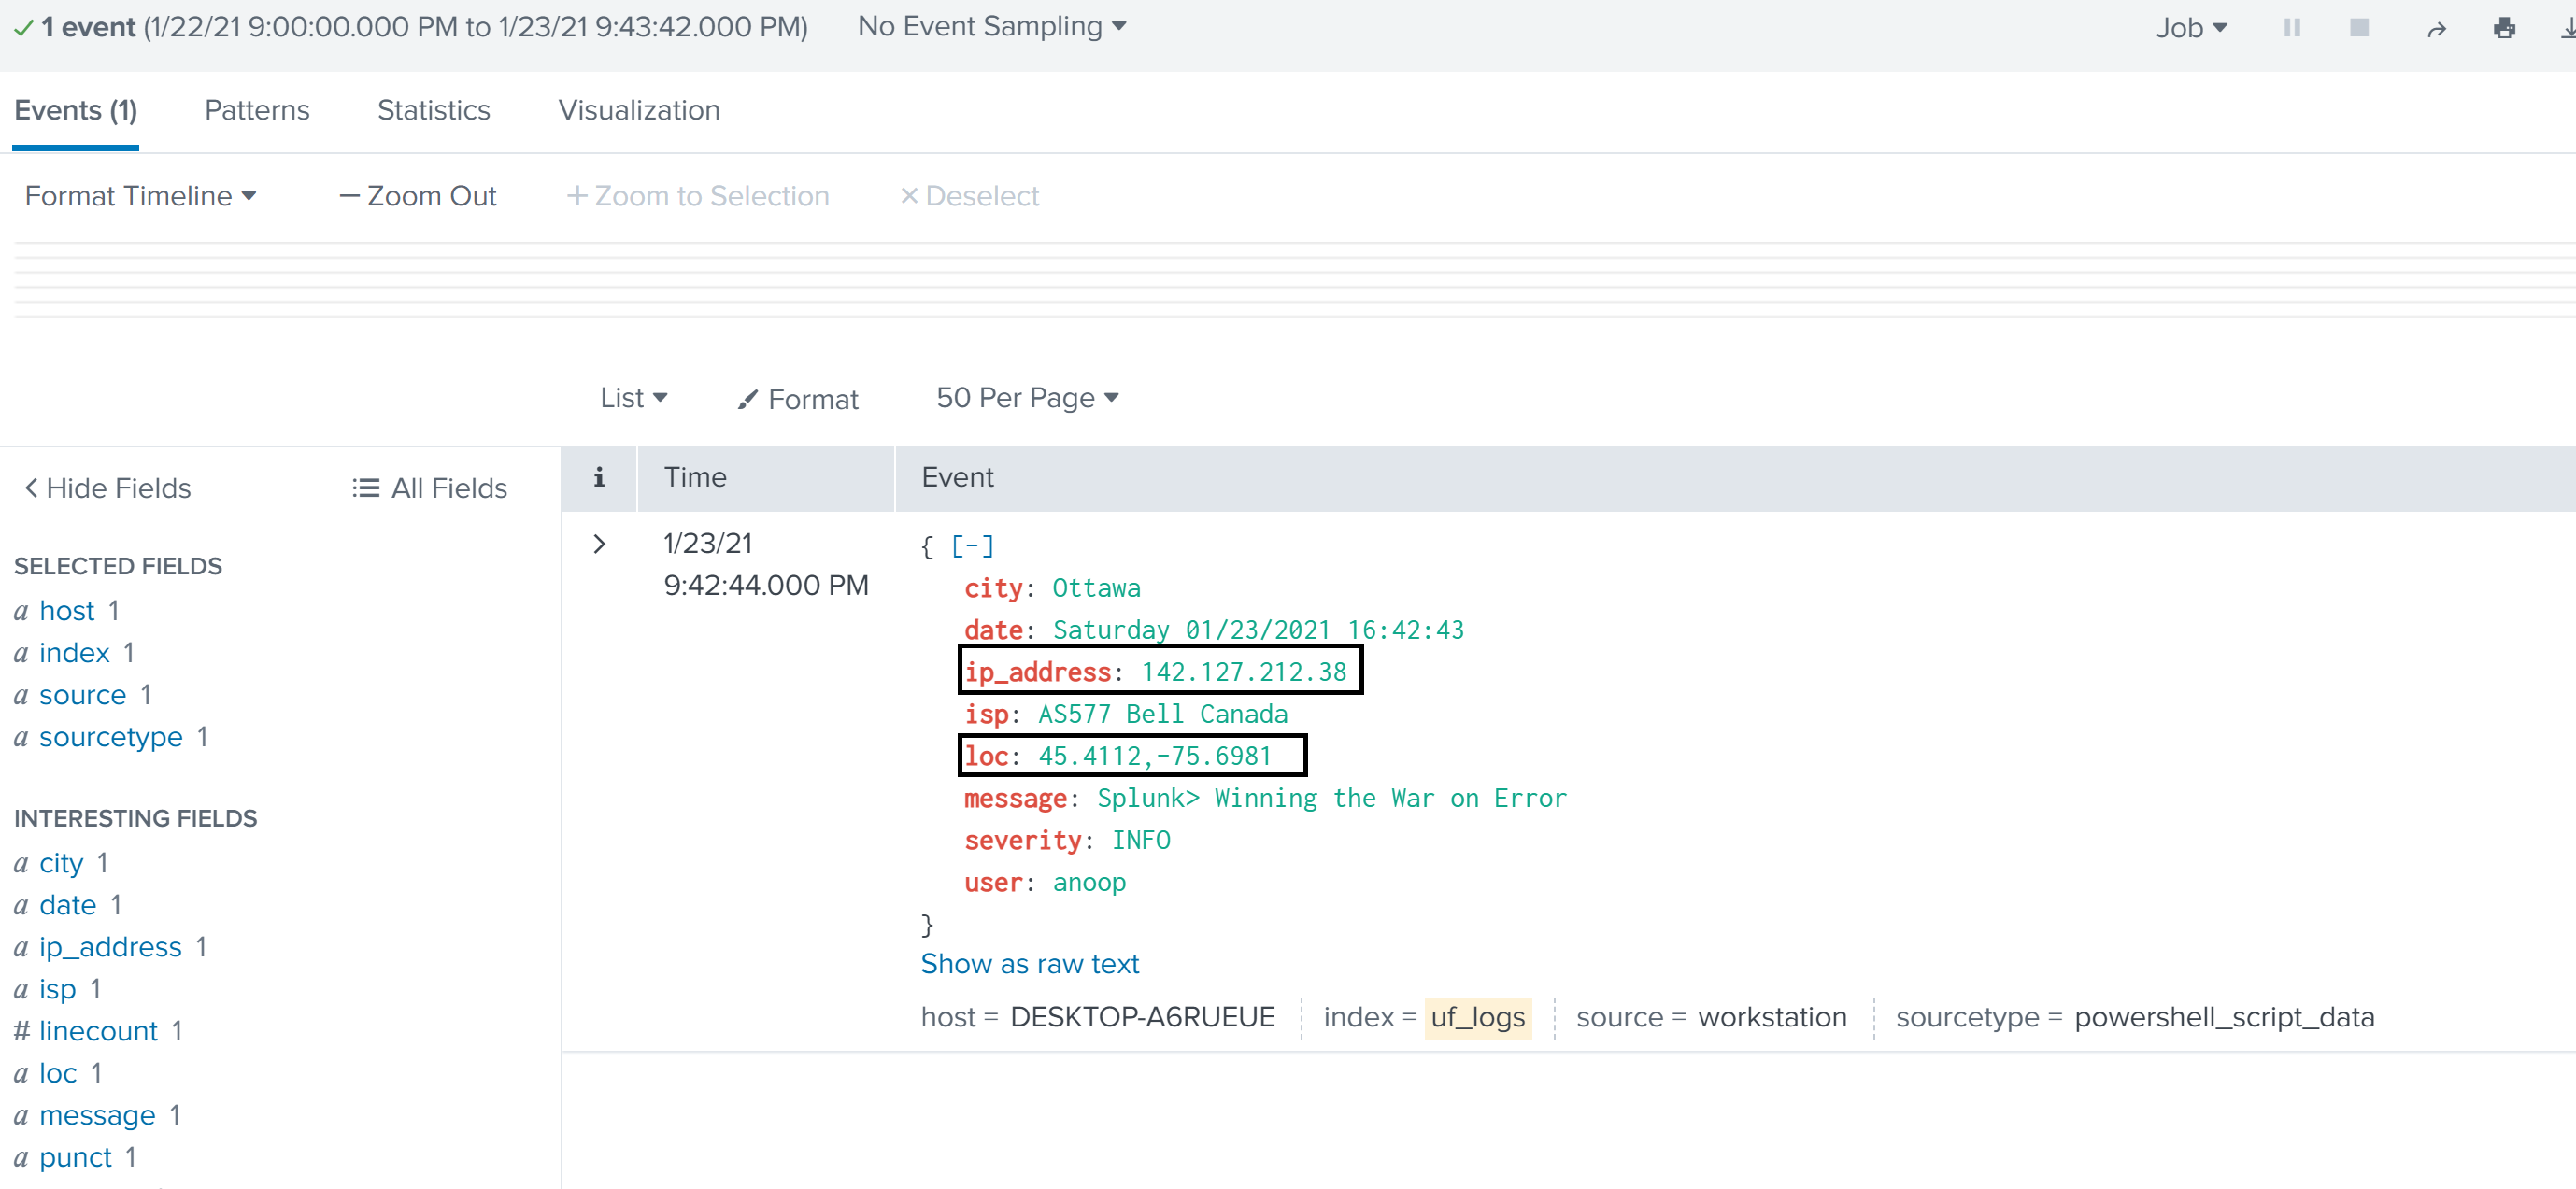
Note the use of GitHub Secrets in the last few attributes. This is a simple yet secure way to storing and accessing sensitive data that is susceptible to misuse by a threat actor. Below image shows where to set them.
PS: remote_port is an accepted attribute that has been skipped here as it defaults to 22. You can choose to specify a port number if default port 22 is not used for SSH.
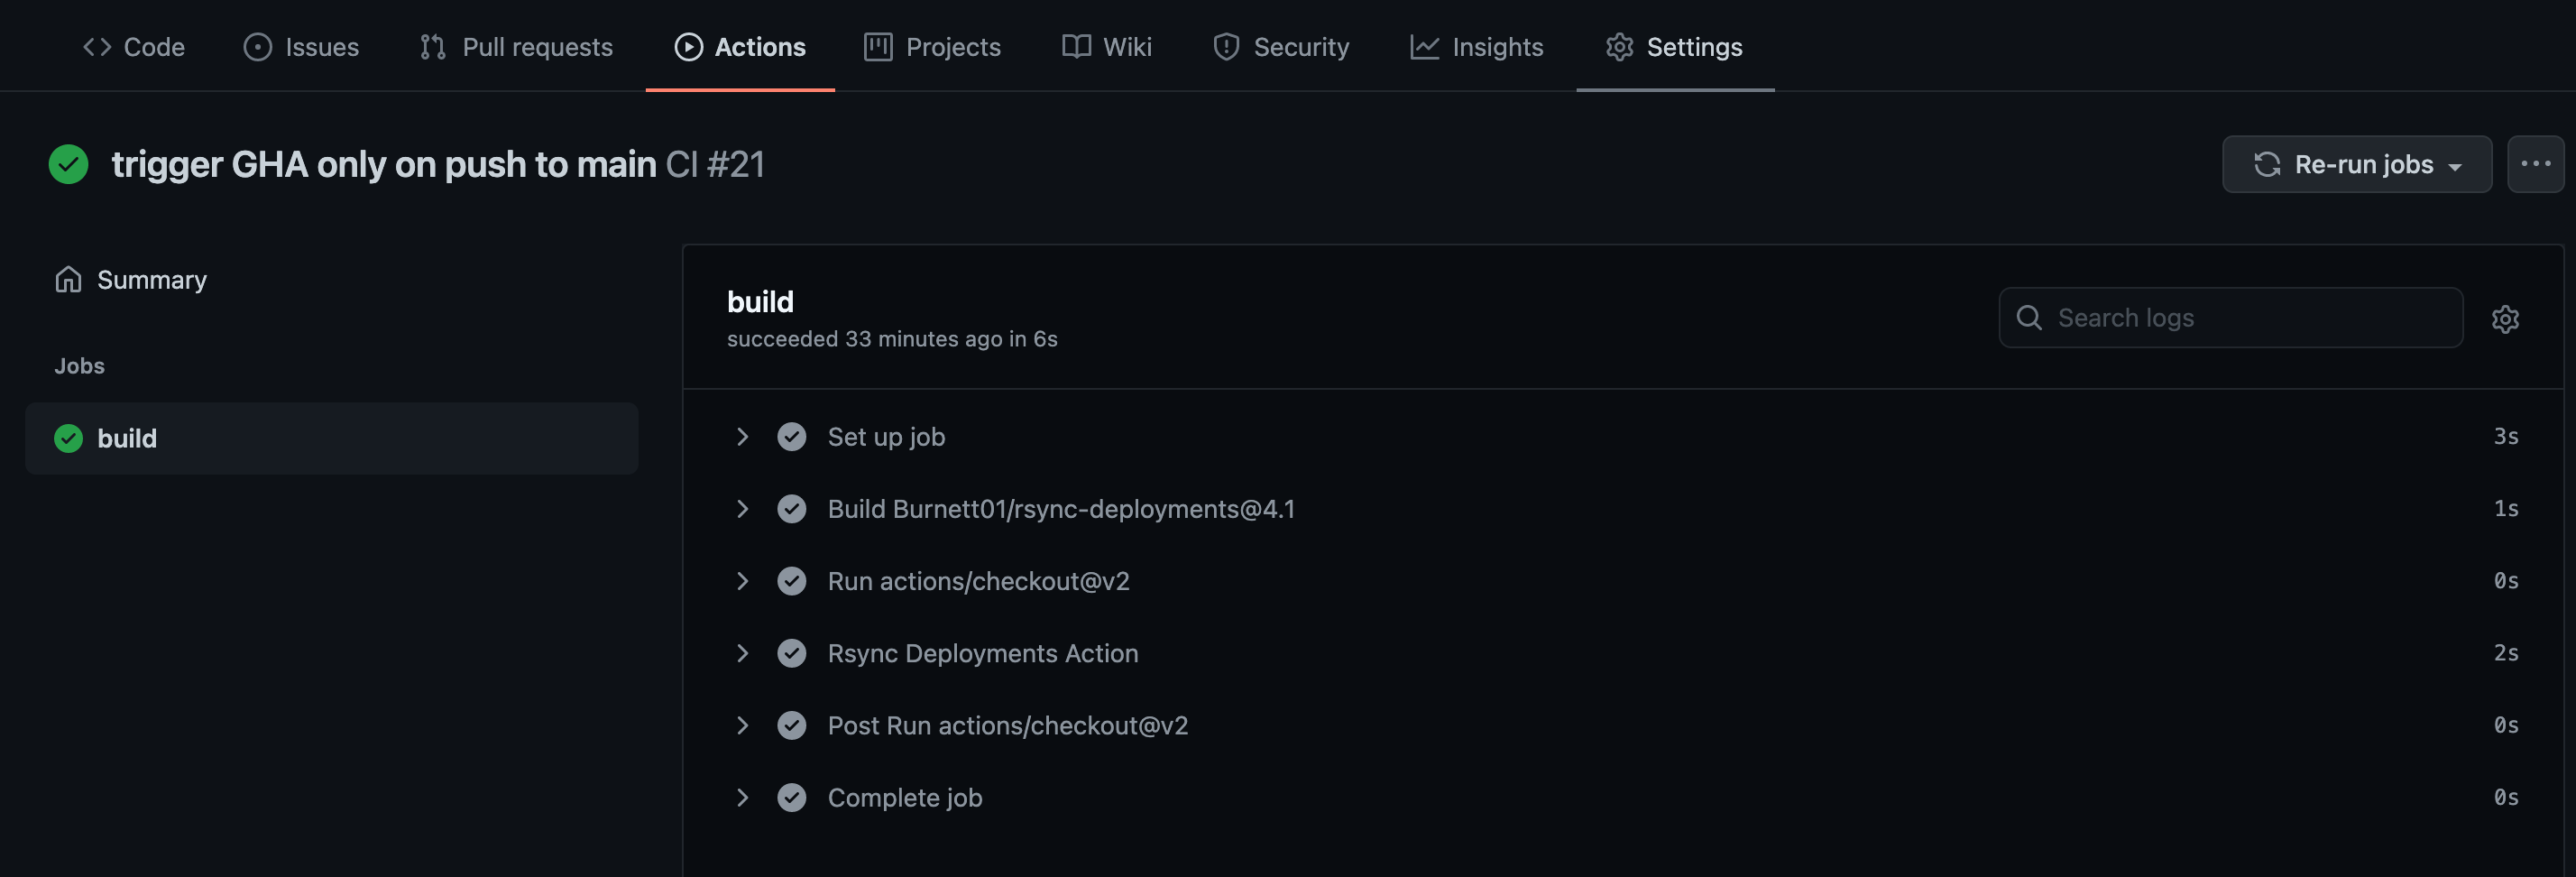
As soon as the above yml file is committed or a new app is committed, the workflow job kicks off. The job status can be verified as seen in the below images.
Go to Actions tab:

Click on the latest run Workflow at the top – here ‘trigger GHA only on push to main’ which is the commit message:

Click on the job – build. You can expand all steps in the build job to look for detailed execution of that step. The build status page also highlights any failed step in red. Expand that step to check failure reasons.
Once it is verified that the job has successfully completed, we can login to the deployment server and confirm that the Splunk apps are pushed to the $SPLUNK_HOME/etc/deployment-apps directory.
$ ls -lart /opt/splunk/etc/deployment-apps/
total 8
drwxr-xr-x  16 splunk splunk 4096 Jun 24 18:11 ..
drwxrwxr-x   4 ghuser ghuser   35 Jun 29 05:00 TA-org_splunk
drwxrwxr-x   4 ghuser ghuser   35 Jun 29 05:00 org_APP_TEMPLATE
drwxrwxr-x   4 ghuser ghuser   35 Jun 29 05:00 org_all_indexer_base
drwxrwxr-x   4 ghuser ghuser   35 Jun 29 05:00 org_all_forwarder_outputs
drwxrwxr-x   4 ghuser ghuser   35 Jun 29 05:00 org_all_deploymentclient
drwxrwxr-x   4 ghuser ghuser   35 Jun 29 05:00 org_all_app_props
drwxrwxr-x   4 ghuser ghuser   35 Jun 29 05:00 org_search_volume_indexes
drwxrwxr-x   4 ghuser ghuser   35 Jun 29 05:00 org_indexer_volume_indexes
drwxrwxr-x   4 ghuser ghuser   35 Jun 29 05:00 org_full_license_server
drwxrwxr-x   4 ghuser ghuser   35 Jun 29 05:00 org_dept_app_inputs
drwxrwxr-x   4 ghuser ghuser   35 Jun 29 05:00 org_cluster_forwarder_outputs
drwxrwxr-x   4 ghuser ghuser   35 Jun 29 05:00 org_all_search_base
drwxrwxr-x   4 ghuser ghuser   35 Jun 29 05:00 org_all_indexes
drwxrwxr-x+ 16 splunk splunk 4096 Jun 29 05:00 .
drwxrwxr-x   3 ghuser ghuser   37 Jun 29 15:21 000_all_forwarder_outputs_route_onprem_and_cloud
A word of caution though, if we are pushing the apps using a user other than splunk that owns $SPLUNK_HOME, then such apps when pushed to the deployment clients will not preserve the ownership or permissions, instead, will have a permission mode of 700. Let’s look at how one of these apps org_APP_TEMPLATE will appear at a target forwarder of a serverclass.
$ ls -lart /opt/splunkforwarder/etc/apps/ | grep org
drwx------  4 splunk splunk   35 Jun 29 18:37 org_APP_TEMPLATE
Now if you’re wondering – wait, do I need to provision an extra server? – be aware that there is also the option of using a GitHub-hosted runner. This needs an update in the push2ds.yml’s runs-on: attribute; for e.g. If you want to simply have a Linux-flavored host as the intermediary, just update the attribute like so – runs-on: ubuntu-latest . But keep in mind that this will require opening the SSH port of the deployment server to external IPs as well as some cost implications.
Conclusion
In this article we touched upon the benefits of version control for Splunk apps managed and distributed via a Deployment Server. Then we explored a simple practical approach to this using GitHub Actions and the main considerations if we’re going down this path. We then proceeded to apply it in a practical use case. If you are not using GitHub in your organization, depending on your CI/CD pipeline, you could possibly re-engineer the solution to fit for purpose. If you found this useful, please watch this space for a sequel about how this opens up further possibilities in end-to-end Splunk apps management in a distributed clustered deployment.
Appendix:
Communication between self-hosted runners and GitHub
About Github-hosted runners – IP Addresses allow-list
About billing for GitHub Actions
Self-hosted runners – Usage limits
Github-hosted runners – Usage limits
How to create a new user that can SSH into a Linux host
Install Docker on Linux
Github Action for Rsync – rsync deployments
Rsync Parameters
Customizing Github-hosted runners
© Discovered Intelligence Inc., 2021. Unauthorised use and/or duplication of this material without express and written permission from this site’s owner is strictly prohibited. Excerpts and links may be used, provided that full and clear credit is given to Discovered Intelligence, with appropriate and specific direction (i.e. a linked URL) to this original content.